Semantic product search with Aiven for AlloyDB Omni
Learn how to perform semantic search using Aiven for AlloyDB Omni. The vector embeddings for the search will be generated using SQL that calls out to VertexAI. The streamlit front-end will show search and insert functionalities in a webpage.
Semantic product search enables users to retrieve results based on the meaning of a sentence rather than the literal words contained in it. It's a great option for allowing users to discover products in a catalog by describing what they want to find, instead of having to guess the exact words used in the product description.
This tutorial walks you through how to perform semantic product search using Aiven for AlloyDB Omni and its native integration with AI tooling.
The embedding calculation, needed for the semantic search, will be done using the VertexAI textembedding-gecko model. The front-end will be developed with a streamlit application, used to display the search and insert functionalities in a webpage.
Create an Aiven for AlloyDB Omni service and enable the AI integration
The first step in the tutorial is to create an Aiven for AlloyDB Omni service. You can create an instance in Google Cloud, AWS or Azure, giving you the maximum flexibility of cloud deployment.
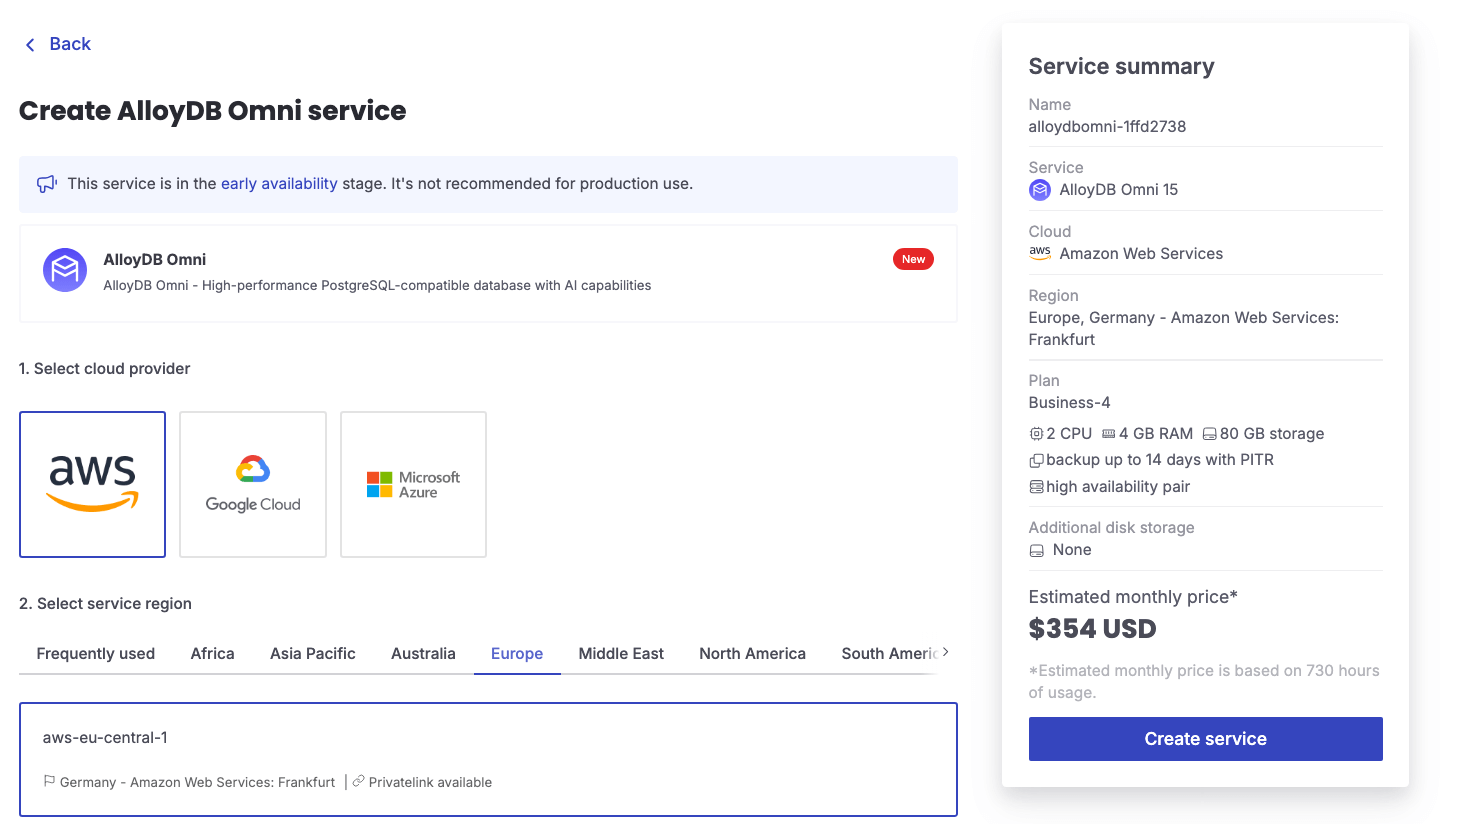
You can review all the steps required to create the Aiven for AlloyDB Omni service in the dedicated Get Started page.
Once the service is up and running, connect to it with psql using the Service URI you can find in the service page of the Aiven Console.
psql [SERVICE_URI]
After connecting, enable the google_ml_integration and vector extensions with:
CREATE EXTENSION IF NOT EXISTS google_ml_integration;
CREATE EXTENSION IF NOT EXISTS vector;
Define the Google credentials for the Vertex AI integration
With the extensions enabled, it's time to upload the Google service account key to be used for the Vertex AI connection.
In the Aiven Console, navigate to the Aiven for AlloyDB Omni service created above and click on the Generative AI tab. There you can find the Google service account key section where you need to upload the Google credentials.
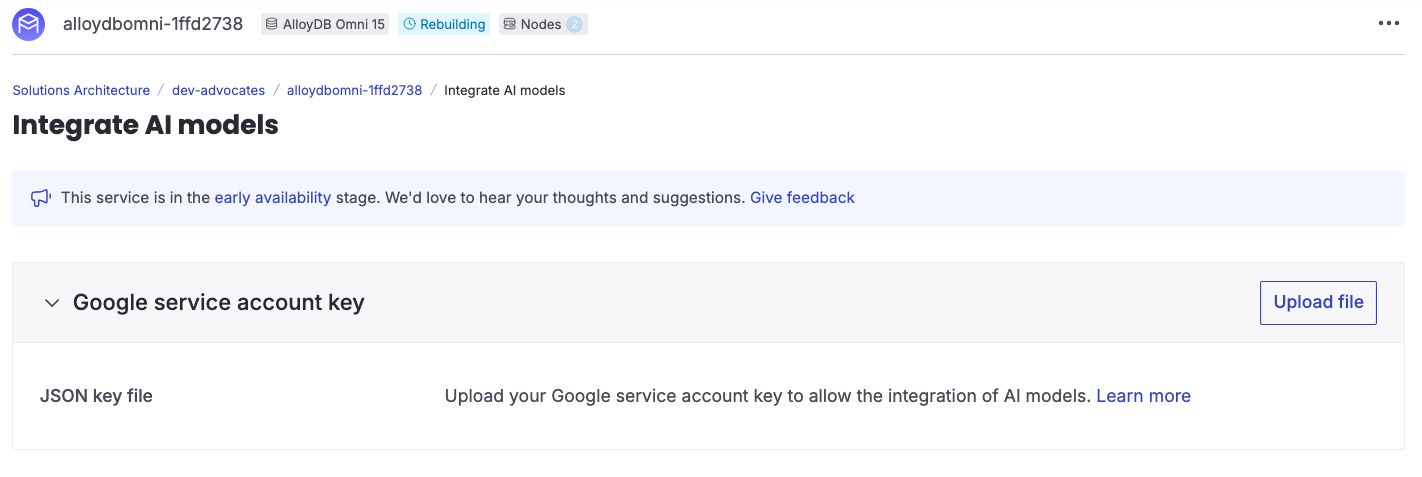
You can find more information about how to retrieve the key in the dedicated Manage Google credential page.
Register the Vertex AI model
With the configuration in place, you now can register the model in Aiven for AlloyDB Omni. You can do it by executing the following SQL:
CALL
  google_ml.create_model(
    model_id => 'textembedding-gecko@001',
    model_provider => 'google',
    model_qualified_name => 'textembedding-gecko@001',
    model_type => 'text_embedding',
    model_auth_type => 'alloydb_service_agent_iam');
The above call registers the model and uses the authentication key defined in the previous step.
Create the data structures and upload the data
With the integration in place, you can then connect to Aiven for AlloyDB Omni and create the following table to store the product inventory.
CREATE TABLE PRODUCT (
    ID SERIAL,
    URL TEXT,
    TITLE TEXT,
    IMAGES TEXT,
    DESCRIPTION TEXT,
    PRODUCT_ID bigint,
    SKU bigint,
    GTIN bigint,
    BRAND TEXT,
    PRICE decimal,
    CURRENCY TEXT,
    AVAILABILITY TEXT,
    UNIQ_ID TEXT,
    SCRAPED_AT TEXT,
    EMB REAL[768]);
The above table, called PRODUCTS contains a set of fields defining the product like ID, TITLE, DESCRIPTION, PRICE and IMAGES containing a set of product images delimited by ~.
It also contains a column EMB where you'll store the embeddings that will be calculated on the DESCRIPTION field using Vertex AI textembedding-gecko model.
You can either populate the data yourself, or, for example, use the Home Depot dataset from data.world. If you chose the latter, you can upload the products in the table with:
\copy PRODUCT (URL, TITLE, IMAGES, DESCRIPTION, PRODUCT_ID, SKU, GTIN,
  BRAND, PRICE, CURRENCY, AVAILABILITY, UNIQ_ID, SCRAPED_AT)
FROM 'home_depot_data_1_2021_12.csv' DELIMITER ',' quote '"'  HEADER csv;
Please note, that the home_depot_data_1_2021_12.csv file needs to be in the same folder where psql has been launched, or you will need to specify full path to the file.
Calculate embeddings for the existing data
The \copy command executed in the previous step populated all the columns apart from the EMB embedding column. To populate that you need to call the VertexAI textembedding-gecko model and retrieve the embeddings. This operation is not possible in standard PostgreSQL®, but AlloyDB Omni makes it available using the google_ml_integration extension you enabled earlier.
To get a sense of how to call the extension you can execute the following:
SELECT google_ml.embedding(model_id => 'textembedding-gecko@001', content=> 'Indoor lamp');
The above calls Vertex AI textembedding-gecko version 001 passing the content Indoor lamp and retrieving the embeddings.
The result will be an array of 768 numbers (exactly the size of the EMB array defined above), representing the prase Indoor lamp.
You can then use the same function to update the EMB column in PRODUCT table with:
UPDATE PRODUCT set EMB = google_ml.embedding(model_id => 'textembedding-gecko@001', content=> DESCRIPTION);
After running the above, you will have the EMB column populated with the embeddings representing the DESCRIPTION column.
Create a trigger to automatically calculate the embeddings in incoming data
You backfilled the EMP column for previously inserted data. What about handling newly inserted rows? For this you can create a trigger that, on every INSERT, calls VertexAI, retrieves the embeddings and stores them in the EMP column.
The first step to achieve this is to create a function to calculate the embeddings:
CREATE OR REPLACE FUNCTION embedding_trigger()
   RETURNS TRIGGER
   LANGUAGE PLPGSQL
AS
$$
BEGIN
   NEW.EMB = calculate_embeddings(NEW.description);
   RETURN NEW;
END;
$$;
And then create a trigger to execute the function on every INSERT (you could similarly do the same for UPDATEs).
CREATE TRIGGER product_update_emb
    BEFORE INSERT ON product FOR EACH ROW
    EXECUTE PROCEDURE embedding_trigger();
If you now insert a new item in the PRODUCT table, the EMB column will be automatically populated. For instance:
INSERT INTO PRODUCT (TITLE, DESCRIPTION) VALUES ('New Lamp', 'New Lamp Description');
Perform semantic vector search
The next step is to perform semantic vector search, based on an input text. Let's assume the user made a query with the text Indoor Lamp.
You can retrieve the closest 10 items in the inventory with the following query:
SELECT
    title,
    substr(description, 0, 100) description,
    price
    FROM product
    ORDER by EMB::vector <-> google_ml.embedding(model_id => 'textembedding-gecko@001', content=> 'Indoor Lamp')::vector
    LIMIT 10;
In the above:
- You are retrieving the
title, the first 100 characters of thedescriptionand the price - The
order by EMB::vector <-> google_ml.embeddingperforms a vector search. To learn more about vector search and optimization, look at the article Speed up PostgreSQL pgvector queries.
The results are:
                               title                               |                                             description                                             | price
-------------------------------------------------------------------+-----------------------------------------------------------------------------------------------------+--------
 New lamp                                                          | My new beautiful lamp                                                                               |  150.0
 Galvan 19 in. White LED Task Table Lamp                           | Design meets functionality in this Galvan table lamp. Perfect for task lighting, the lamp offers th |  25.55
 15 in. Chandra Ivory Ceramic Table Lamp                           | Inspired by the soft elegance of a cottage along the coast, this contemporary table lamp adds a tou |  28.84
 2-Light Iron Black Bath Light                                     | This attractive bath light will look so wonderful inside your home. It features a beautiful iron bl | 119.99
 Jane 26 in. Glass Table Lamp, Clear                               | Originally an icon of rustic charm, the French demijohn shape gets a modern update in sleek, clear  |  62.56
 Kayden 25. 5 in. Navy Blue Table Lamp with White Shade            | Give your decor the perfect finishing touch with this Kayden Table Lamp. Pleated navy blue ceramic  |  69.41
 New Lamp                                                          | New Lamp Description                                                                                |
 Polo 1-Light Brushed Nickel Pendant                               | The POLO pendant will light up your home with a retro industrial style. Featuring a wide bowl shade | 120.75
 Hanging Globe 1-Light Satin Aluminum Pendant                      | The Sea Gull Lighting Hanging Globe 1-light indoor pendant in antique brass is the perfect way to a |  82.37
 Happy Hedgehog 21.5 in. White, White Wash, Gray Accent Table Lamp | An adorable option for a child's room or nursery, this table lamp features a little hedgehog as the |  57.18
(10 rows)
Create a Web UI with streamlit
The last piece of the solution is to create a Web UI enabling users to perform semantic search and operators to add products to the inventory.
To showcase the functionality, you can build an app using streamlit with two pages, one dedicated to Search and one to Add items to the inventory.
Warning
The example presented here is an oversimplified prototype, not requiring any security login. For production workloads we strongly suggest you implement additional security layers.After installing streamlit, you will need to create a main project folder, called demo-app. Within that folder create:
-
A
requirements.txtfile listing all the packages need for the applications, which are the followingpsycopg2-binary sqlalchemy google streamlit streamlit-aggrid -
A
secrets.tomlcontaining the connection secrets to Aiven for AlloyDB Omni. Replace[HOSTNAME],[PORT],[USER],[PASSWORD]with the details you can find in the Aiven Console:[connections.postgresql] dialect = "postgresql" host = "[HOSTNAME]" port = "[PORT]" database = "defaultdb" username = "[USER]" password = "[PASSWORD]"
Create the semantic search page
To provide the semantic search functionality, create a page called Search.py with the following content:
import streamlit as st

st.set_page_config(layout="wide")

# Initialize connection.
conn = st.connection("postgresql", type="sql")

def search_in_db(query):

    df = conn.query('''
        SELECT
        CASE WHEN position('~' IN images) = 0
            THEN Images
            ELSE
                substr(images, 0, position('~' IN images))
        END IMG_URL,
        title,
        price,
        substr(description, 0, 100) description
        FROM product
        order by EMB::vector <-> google_ml.embedding(model_id => 'textembedding-gecko@001', content=> :query)::vector
        limit 10''', params=query, ttl=10)

    st.data_editor(
        df,
        column_config={"img_url": st.column_config.ImageColumn(
            "Image", help="item preview", width="80px"
        )})

st.header("Semantic Product Search")

col1, col2 = st.columns([6,1])
with col1:
    st.write("Powered by Aiven for AlloyDB Omni")
with col2:
    st.image("https://aiven.shop/cdn/shop/files/aiven-logo_RGB.png", width=100)

form = st.form(key="match")
with form:
    query_str = st.text_input("Find Product")
    submit = st.form_submit_button("Search")
    if submit:
        search_in_db({"query":query_str})
Please note:
- The SQL query retrieves the first image from the
IMAGEScolumn (separated by~), alongside the title, price and truncated description. It's using the same syntax to perform embedding calculation and vector search that we defined in the previous section. - The
query_stris collected in the form and passed to thesearch_in_dbfunction
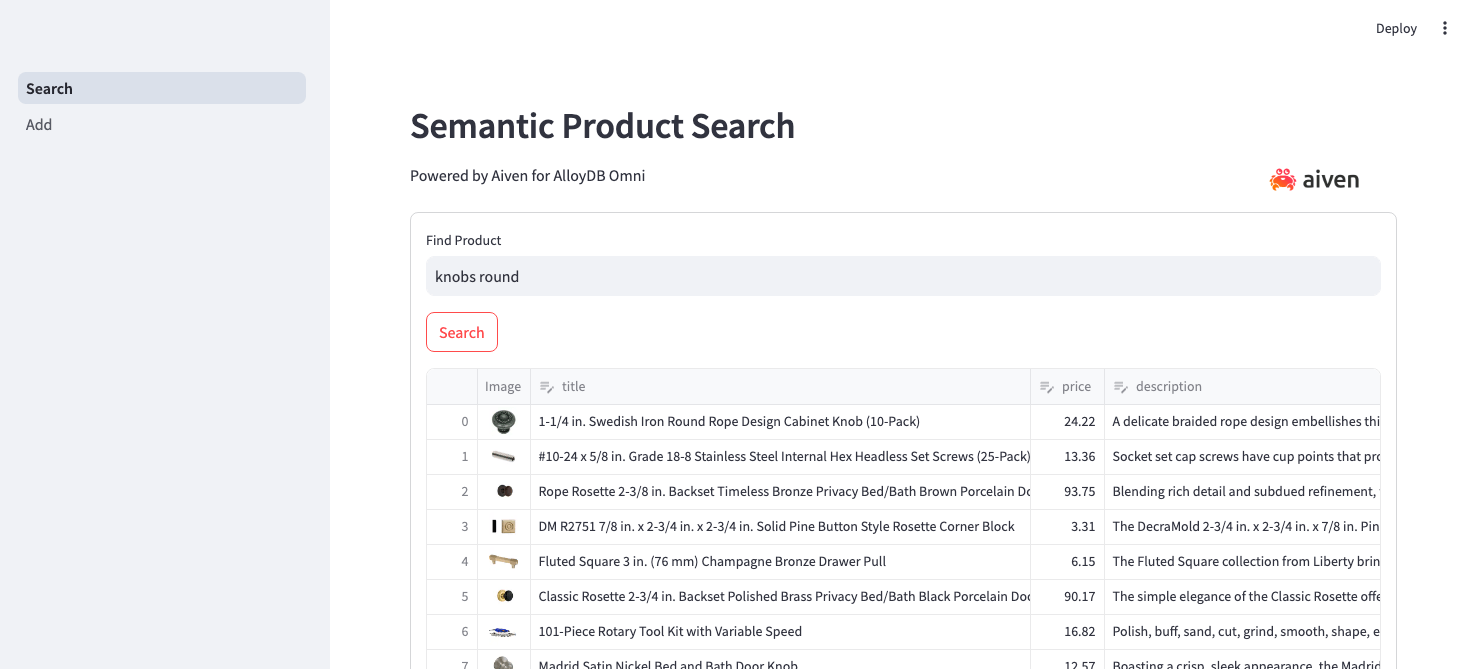
You can now run the application with:
streamlit run Search.py
The above command opens a new webpage where you can browse the inventory. Searching for knobs round will likely show you the following results:
Create the add items page
Similarly we can create a page to add items to the inventory. To do so, create a folder called pages and, within it, a new file named Add.py with the following content:
import streamlit as st
from sqlalchemy.sql import text

st.set_page_config(layout="wide")

conn = st.connection("postgresql", type="sql")

st.header("Add new product to Inventory")

col1, col2 = st.columns([6,1])
with col1:
    st.write("Powered by Aiven for AlloyDB Omni")
with col2:
    st.image("https://aiven.shop/cdn/shop/files/aiven-logo_RGB.png", width=100)

with st.form("New Product"):
    st.write("Add a new product")
    my_title = st.text_input('Title')
    my_description = st.text_input('Description')
    my_price = st.number_input('Price')
    my_image = st.text_input('Image Url')
    submit_button = st.form_submit_button('Submit item')

    if submit_button:
        with conn.session as s:
            try:
                s.execute(
                    text('INSERT INTO product (title, description, price, images) VALUES (:title, :description, :price, :image);'),
                    params={"title": my_title, "description": my_description, "price": my_price, "image": my_image})
                s.commit()
            except Exception as e:
                print(e)
            finally:
                st.write("Saved")
Apart from decorative code, the main page functionality is contained in a single statement:
s.execute(
    text('INSERT INTO product (title, description, price, images) VALUES (:title, :description, :price, :image);'),
    params={"title": my_title, "description": my_description, "price": my_price, "image": my_image})
This inserts the data into Aiven for AlloyDB Omni. Be careful to check that the insert only sets the title, description, price and images columns. The EMB column containing the embedding will automatically be populated by the trigger defined above.
To test the new page you just have to refresh the web page opened before, after which you should see a new tab called Add. Clicking on it will take you to the form enabling you to add items to the inventory.
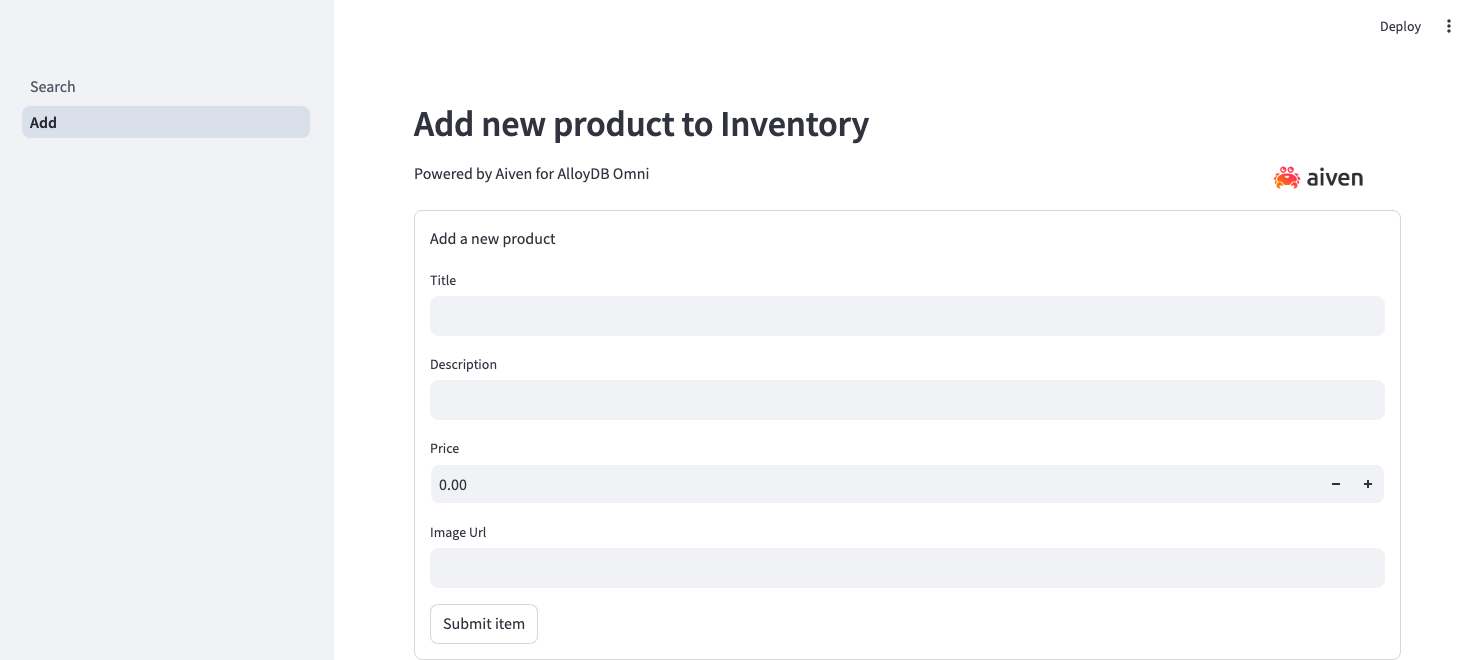
It's time for testing now. Add items to the inventory and check if the semantic search results are influenced by the new products.
Conclusion
Semantic search is rapidly becoming a must have for any web facing tools. The ability to find content/products based on the semantics of the query rather than the actual wording enables a huge variety of users with different language skills to be able to find content rapidly and effectively.
While performing semantic search in the past required having separated compute instances to invoke AI models and retrieve embeddings, Aiven for AlloyDB Omni enables developers to provide semantic search functionality with only SQL statements and a basic front-end application. This improves the simplicity and robustness of any semantic search or AI driven application.
You can start trying out Aiven for AlloyDB Omni now, in the Aiven Console, or read more in the Aiven documentation.
Table of contents
- Create an Aiven for AlloyDB Omni service and enable the AI integration
- Define the Google credentials for the Vertex AI integration
- Register the Vertex AI model
- Create the data structures and upload the data
- Calculate embeddings for the existing data
- Create a trigger to automatically calculate the embeddings in incoming data
- Perform semantic vector search
- Create a Web UI with streamlit
- Create the semantic search page
- Create the add items page
- Conclusion